Striking the Triangle: Technique for a Clear, Shimmering Sound
Who
This technique is for percussionists in middle school, high school, and community bands and orchestras, as well as band directors who teach them. Proper triangle technique is especially important for young players who often produce a dull or “clunky” sound instead of the bright, ringing tone the instrument is capable of.
What
The challenge is getting a clear, sustained, shimmering sound from the triangle rather than a dull thud or weak tone. Many students strike the instrument incorrectly, resulting in poor tone quality and lack of projection.
Why
With most percussion instruments (snare drum, timpani, marimba, etc.), we generally want a strong fundamental pitch with controlled overtones. The triangle is the opposite. It has no clear fundamental pitch. Its beauty and characteristic sound come almost entirely from its high overtones. Striking it in the wrong place or with the wrong angle excites the fundamental too much, producing a dull “clunk” instead of the bright, shimmering ring we want. Proper striking technique maximizes the overtones while minimizing unwanted lower frequencies.
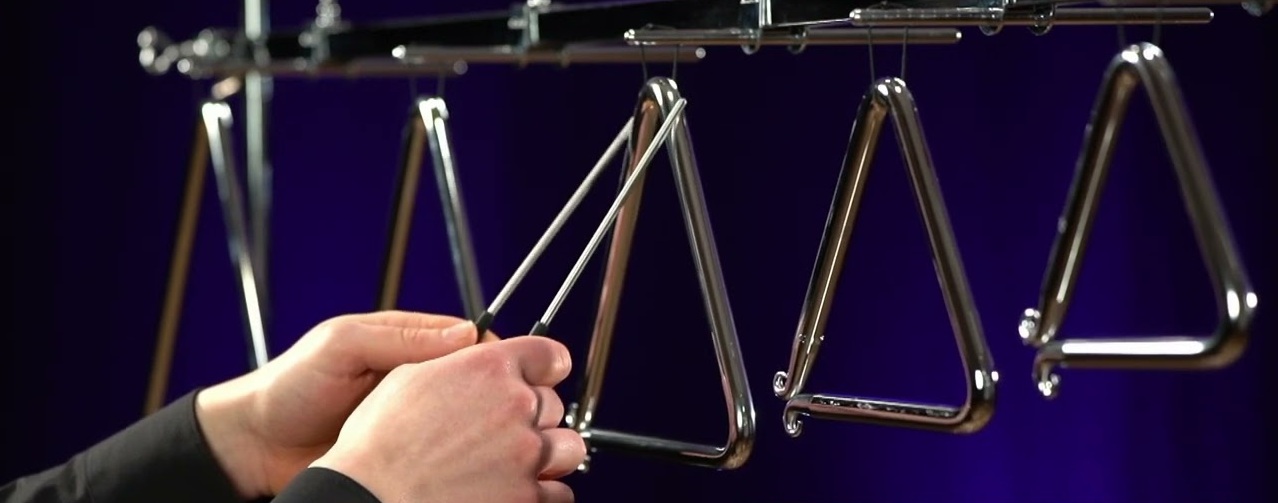
Where
The triangle should be struck in a very specific area:
- Hold the triangle so one side is roughly horizontal.
- Strike near a corner, but not directly on the bend.
- The ideal striking zone is approximately one-third of the way along one of the sides from the corner.
- Avoid striking the middle of any side. This produces a weaker, less desirable tone.
When
Use proper triangle technique whenever the instrument appears in the music, especially in:
- Sustained rolls or long notes that need to ring clearly.
- Delicate, exposed passages in band and orchestral literature.
- Warm-up exercises and sectionals when developing tone quality.
- Performances where the triangle must cut through the ensemble without sounding harsh.
How
Follow these steps for a better triangle sound:
- Beater Selection
Use a proper triangle beater (a thin metal rod). Avoid drumsticks, which are too thick and produce a dull sound. Thinner beaters generally produce a brighter, more overtone-rich tone, while slightly thicker ones can give more volume. Many professionals carry several beaters of different thicknesses. - Beater Angle
Hold the beater at approximately a 30–45 degree angle to the triangle. Striking straight on (90 degrees) tends to excite more of the fundamental and creates a “clunky” sound. A slight angle helps excite the overtones more effectively. - Striking Location
Strike near a corner, about one-third of the way along the side. This spot consistently produces the clearest, most shimmering tone with the best balance of overtones. Striking too close to the bend or in the middle of a side usually results in a weaker or muddier sound. - Stroke and Touch
Use a quick, light stroke with a slight rebound. Let the triangle ring freely after each strike. Avoid gripping the beater too tightly or “digging in,” which can dampen the overtones. - Triangle Position
Hold the triangle so it can ring freely. Many players suspend it from a stand using a thin cord or fishing line rather than holding it by hand, which allows for maximum resonance.
Conclusion
Unlike most percussion instruments, the triangle’s musical value comes from its overtones, not its fundamental pitch. By striking near a corner at a 30–45 degree angle with a proper beater, percussionists can produce the clear, shimmering sound the triangle is known for. Teaching students the correct striking zone and angle early prevents the common “clunky” triangle sound and helps the instrument blend beautifully in the ensemble. With consistent practice of these fundamentals, even young players can make the triangle sound professional and musical.