Importance of Flute Cork Position and Adjustment
Who
This issue affects flutists, from middle school beginners to professional players, and band directors guiding them in school or community ensembles. Maintaining proper head joint cork position is crucial for students and professionals to achieve optimal intonation and tone.
What
The challenge is ensuring the head joint cork is correctly positioned to maintain proper intonation, tone, and response. Misalignment causes sharp or flat notes, disrupting ensemble performance, and requires regular checks and adjustments to restore playability.
Why
The flute’s open-hole design makes the cork’s position critical for aligning the air stream with the embouchure hole, as noted in Flute Fundamentals. Misalignment—due to improper cleaning, temperature changes, or cork wear—alters the air column length, causing sharp high notes (e.g., high C, D) or flat/stuffy low notes (e.g., low C, D), affecting octave transitions and ensemble blend.
Where
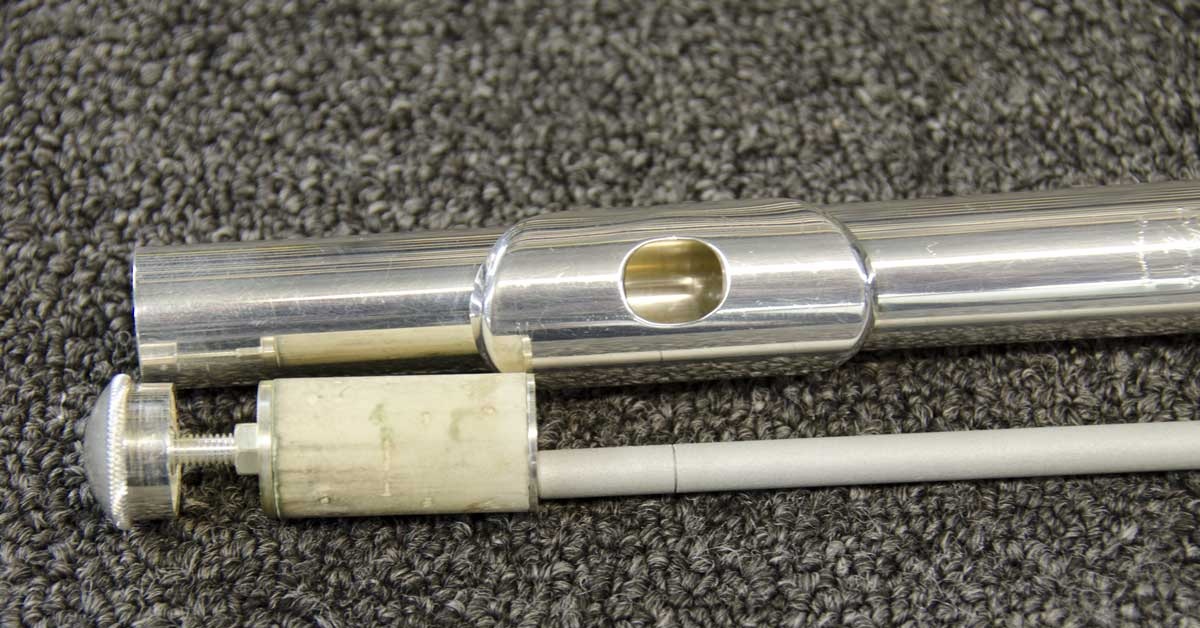
Cork adjustments are applied via:
- Head Joint Cork: Positioned to align the air stream, set at approximately 17mm from the embouchure hole’s center.
- Cleaning Rod: Using the rod’s notch to check and adjust the cork to the embouchure hole’s center.
When
Check and adjust the cork in:
- Pre-Performance Preparation: Before rehearsals or concerts, especially for high school pieces like Holst’s First Suite in Eb with exposed flute parts.
- Tuning Sessions: During ensemble tuning to ensure pitch accuracy (A=440 Hz).
- Technical Passages: In runs crossing octaves (e.g., middle D to high D), where misalignment affects transitions.
- Maintenance Routines: After cleaning or in response to temperature changes causing cork shifts.
How
To maintain proper cork position:
- Check Regularly: Use the cleaning rod’s notch to ensure the cork aligns with the embouchure hole’s center before rehearsals or performances.
- Teach Students: Show students how to check and adjust the cork, emphasizing the 17mm distance, as shown in Flute Fundamentals.
- Improvise in Emergencies: If a cleaning rod is unavailable, measure 17mm on a substitute tool (e.g., a marimba mallet). I once faced a cork crisis before a high school performance when a student’s flute played sharp in high notes and stuffy in low ones. With no cleaning rod, I marked 17mm on a marimba mallet with tape, adjusted the cork, and restored intonation, saving the performance.
- Monitor Intonation: Use a tuner to verify pitch across octaves, ensuring high and low notes align with A=440 Hz.
- Maintain the Cork: Replace worn or loose corks to prevent frequent misalignment.
- Practice Transitions: Incorporate octave exercises (e.g., low C to high C) to test cork alignment’s impact on response.
- Annotate Repertoire: Mark parts in pieces like Sousa’s Stars and Stripes Forever to remind students to check cork position for exposed passages.
Conclusion
The head joint cork’s position is vital for flute intonation, tone, and response, with misalignment causing sharp high notes or flat/stuffy low notes. By using the cleaning rod’s 17mm notch, improvising solutions like my marimba mallet adjustment, and maintaining corks, directors and flutists ensure consistent playability. Regular checks and tuner practice empower students to excel in demanding repertoire, enhancing the band’s polished sound.